Advanced Grading Report
Advanced grading methods enable various assessment forms to be used for calculating grades.They may be used in Assignment and Forum activities.
2 types of grading method
- Rubrics
- Marking Guide
Configuring an activity module to use advanced grading methods
Modules that support advanced grading methods have the grading method selector included in their settings form (for example, in the Assignment settings form). The lecturer can choose either ‘Simple direct grading’ or others method available. Selecting ‘Simple direct grading’ means that the advanced grading is not used and the standard grade selector is displayed.
An alternative way is to follow the’ Advanced grading’ link in Administration > Activity administration. The link leads to a page where the current active grading method can be changed, too.
The form definition and the associated assessment data are stashed when the grading method is changed from one type to another. That means it is safe to change the current active grading method from ‘Rubric’ to ‘Simple direct grading’ and back to ‘Rubric’. The rubric definition is kept in the database, although it may not be available while the current grading method is set to another method.
Part 1
Rubrics
Rubrics are an advanced grading method used for criteria-based assessment. The rubric consists of a set of criteria plotted against levels of achievement. A numeric grade is assigned to each level. For each criterion, the assessor chooses the level they judge the work to have reached. The raw rubric score is calculated as a sum of all criteria grades. The final grade is calculated by comparing the actual score with the worst/best possible score that could be received.
Enable a rubric in your assignment
There are two ways.
The first is at the point of setting up the Assignment.
- In your assignment’s Settings, expand the Grade section.
- From the Grading method menu, choose Rubric.
- Note the Maximum grade setting – whatever numeric grade you assign to your criteria levels, the ultimate grade for the assignment will be recalculated as the proportion of that maximum grade.
- Save the settings; Rubric is now enabled for that particular Assignment.
The other is via the Assignment’s Settings block:
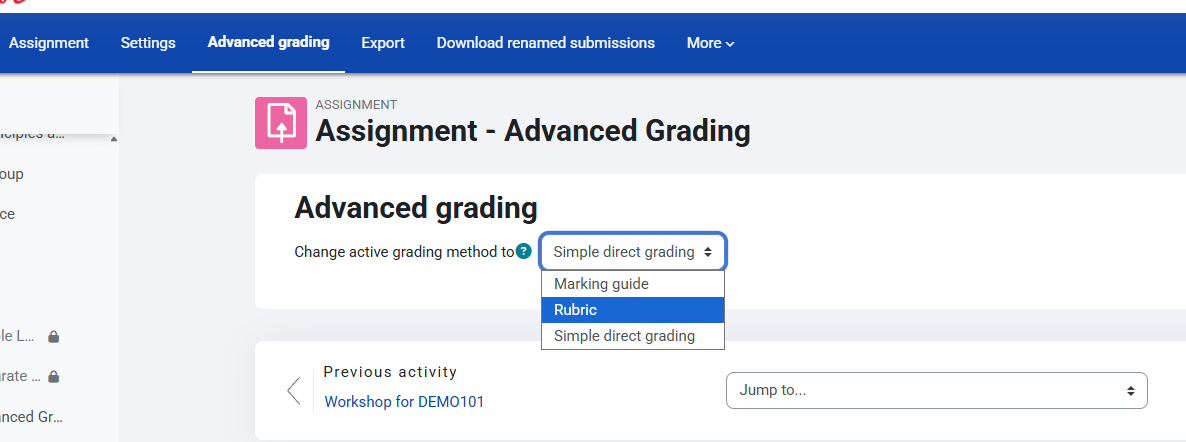
- From the Assignment’s summary page, in its Settings block, click Advanced grading; a new page displays a menu.
- From the Change active grading method to menu, choose Rubric; this initiates the rubric setup process.
Define your rubric
To define a new rubric from scratch:
- Go to the Rubric editor via the Advanced grading link in the assignment’s Settings block.
- Click Define a new rubric from scratch.
- Type in a brief distinctive Name and (if needed) a description.
- Click to edit a criterion and Click to edit level lets you tab through the rubric to type a description and assign points to each level.
- Describe further criteria and levels as appropriate.
- Set Rubric options.
- Finally save the rubric definition by clicking Save rubric and make it ready or Save as draft. These set the form definition status respectively as described at the Advanced grading methods page.

Grading submissions with a rubric
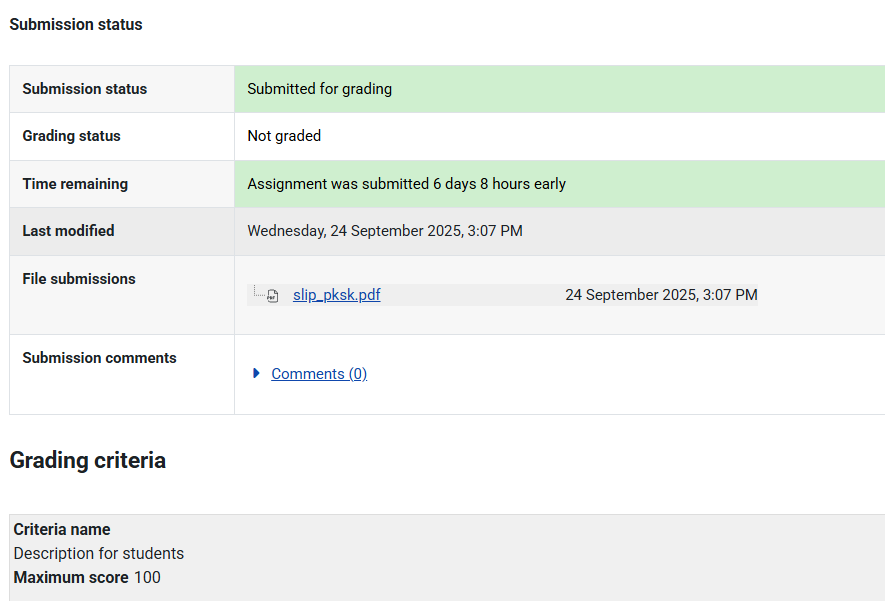
- To access the submissions, click a link to the Assignment; its summary page displays.
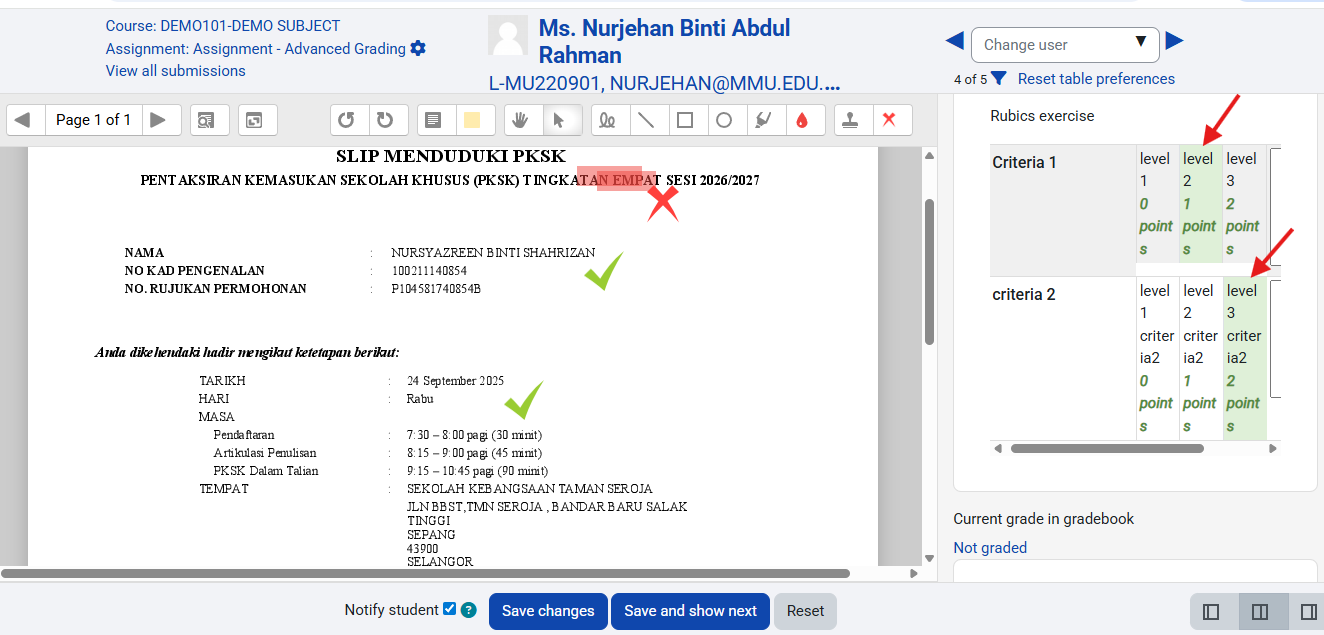
- Click Grade; the Student Grading Page displays the work of the first student listed in the Grading Table.
- The rubric you have set up will display as a table on one side of the screen – you can display it larger by clicking its Expand / arrowheads icon (to dock the rubric, click the icon again).
- For each criterion, select a level by clicking in its cell; when selected the level displays shaded (default pale green)-refer arrow in picture.
- If enabled on the rubric form, you can type in comments for each criterion.
- Save changes.
Part 2
Marking Guide
Creating a new Marking guide
- When the assignment has been created, and the Marking guide is selected as above, click Save and display and choose Define new grading form from scratch.
- (See section 5 for information on how to use a template.)
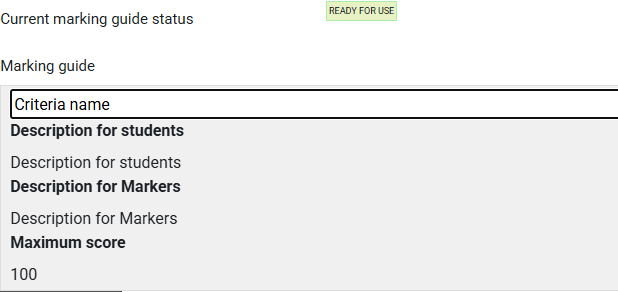
- Give the guide a name and description.
- Click on the criterion name to edit it. It will open up a box for typing into.
- Click the Click to edit links to provide an explanation for students and for markers as to what is required. It will open up a box for typing into.
- Click the Click to edit link to allocate a maximum mark for this criterion. It will open up a box for typing into.
Adding more criteria
- Click the button to add one or more criteria (and then repeat the process as above)
Adding frequently used comments
- If a teacher regularly uses the same comments when marking, adding them to a frequently used comments bank is possible.
- Click the Click to edit link and add a comment.
- Click the +Add frequently used comment button to add another one and repeat as needed.
Saving and using Marking guide
- Once completed, the guide may be saved as a draft or saved and made ready to use, according to the button selected at the bottom of the screen.
Editing or deleting Marking guide
- Once completed, a guide may be edited or deleted by going to Settings>Assignment administration>Advanced grading>Marking guide. Options appear to edit or delete the currently defined form.
- When an assignment has been graded, a warning appears if the guide is edited to check whether the assignments need to be regraded or not.

Marking assignments
- When the assignment to be graded is accessed in the usual way, the form appears with the criteria and an empty comments and score box. If frequently used comments have been added, the teacher clicks into the box and then clicks on the required comment to insert it:

How students view the marking guide
When students click on an assignment with a marking guide attached to it, they will see the marking guide as part of the information about their assignment. Thus, they can see the marking guide before they submit.